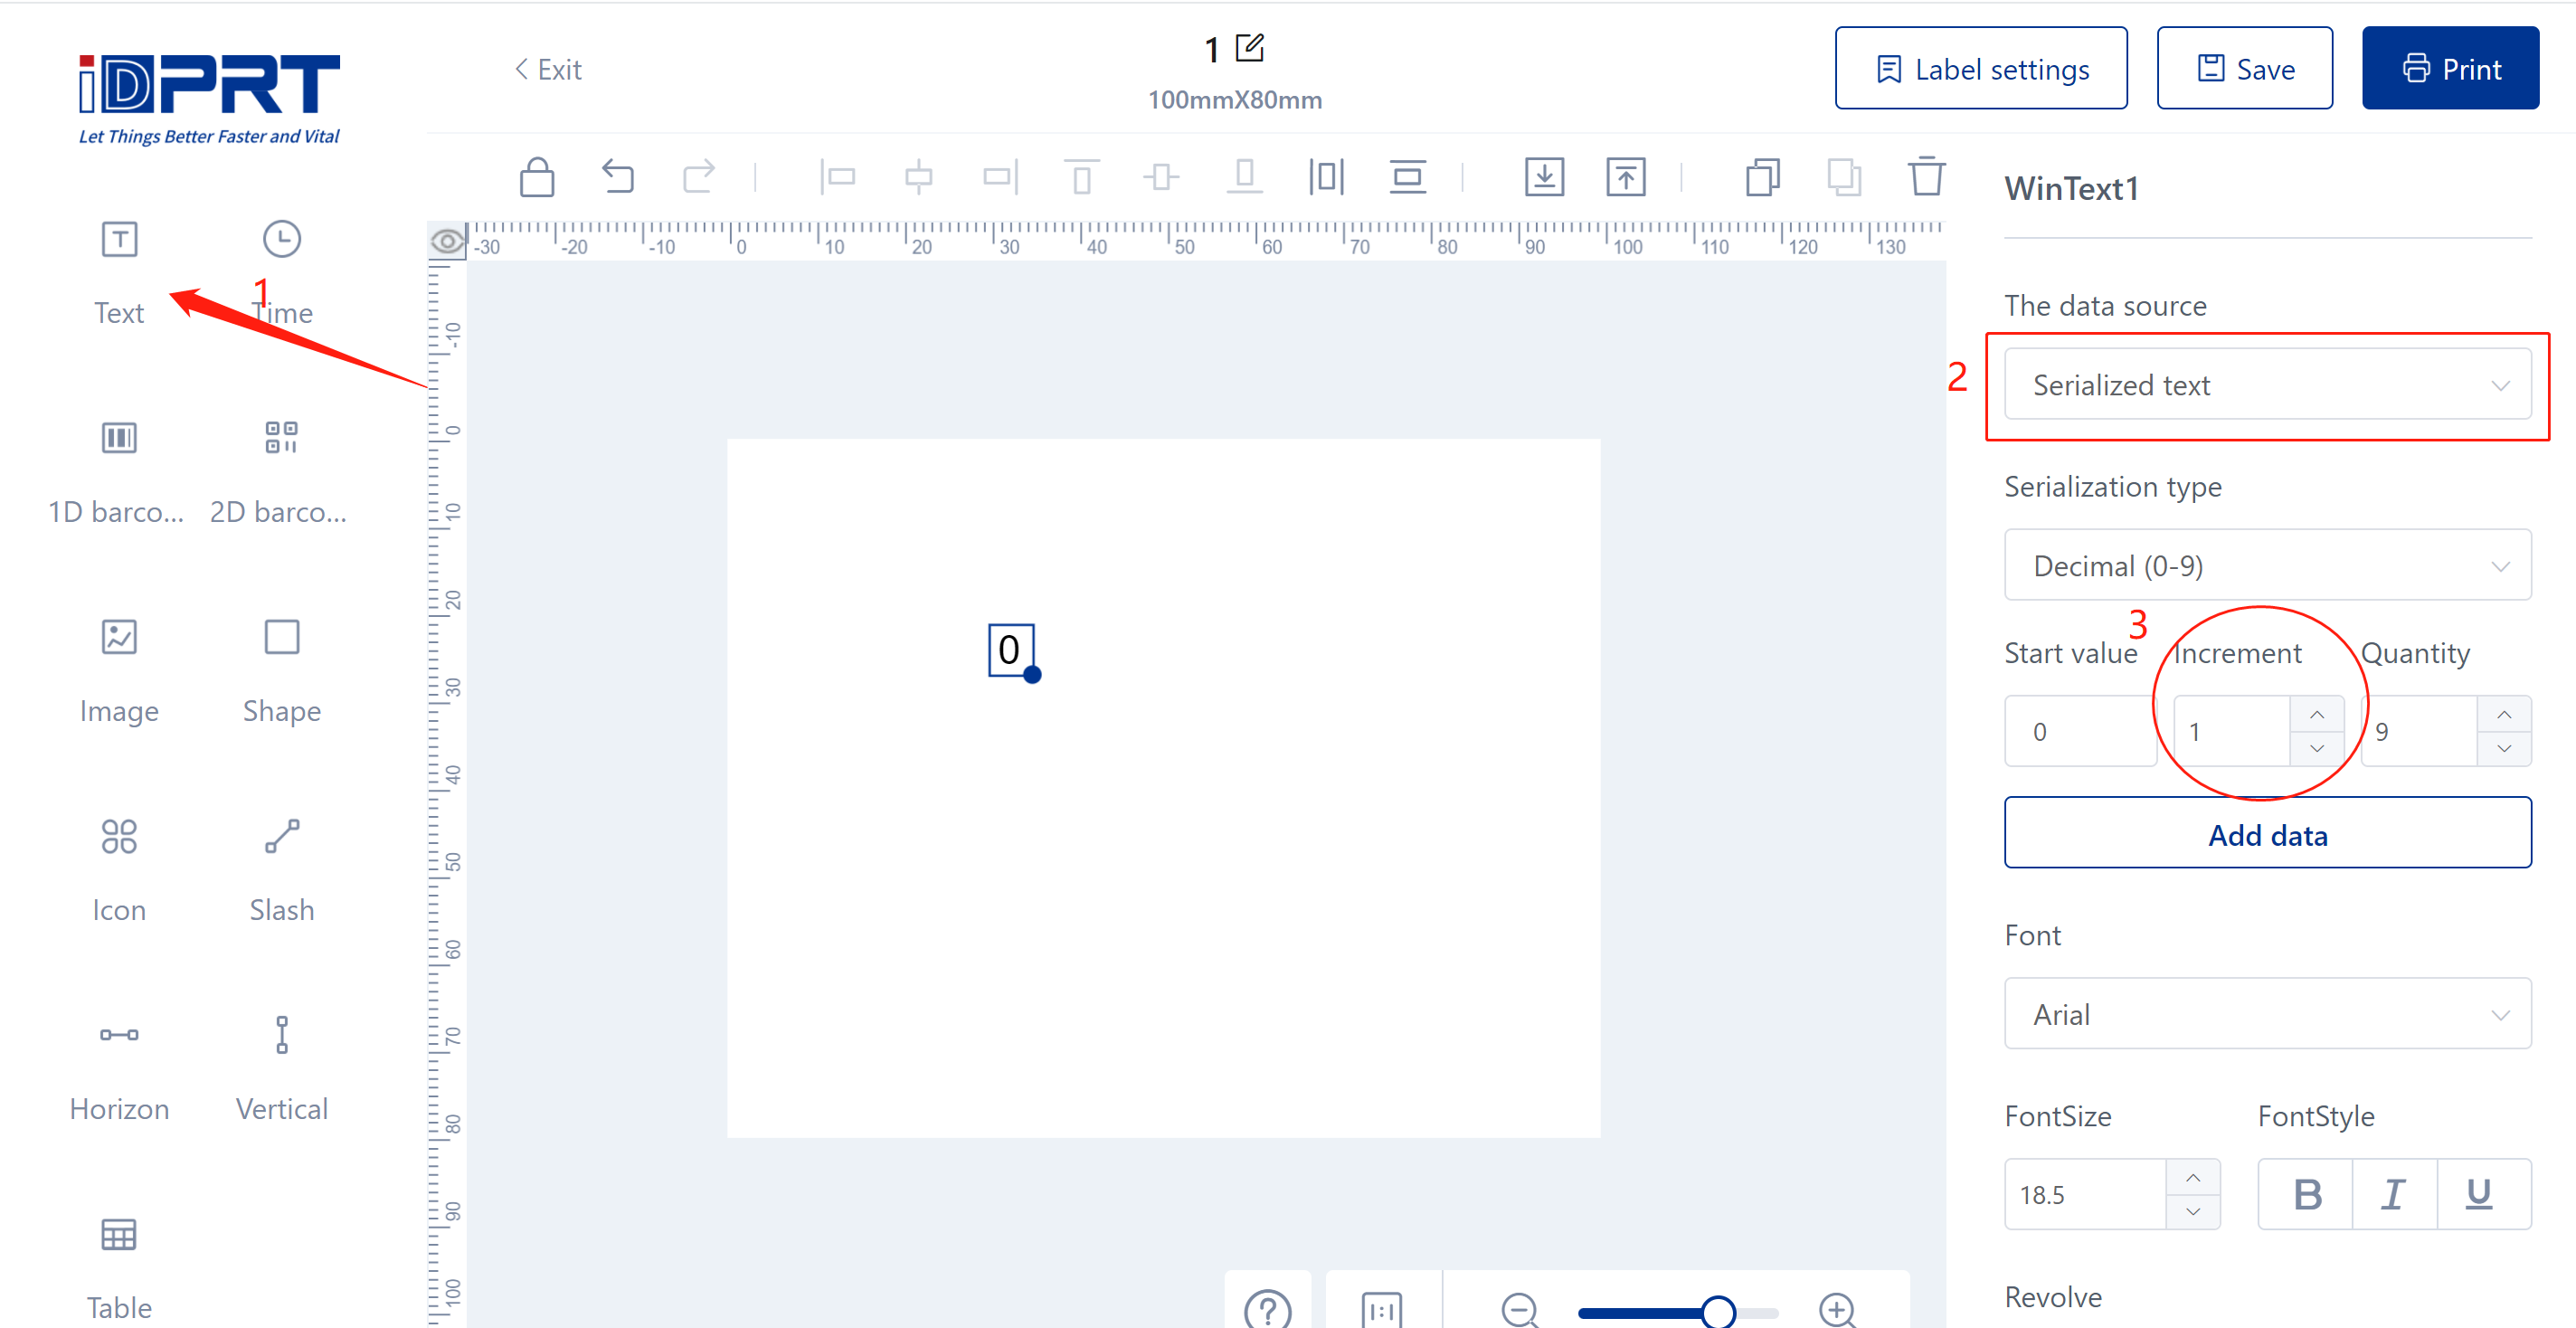
Setting of serialization
1.Click on the 'Text' icon from the left-hand toolbar to add a text element to your label.
2.In the properties panel on the right, locate the 'Data source' section. Click on the dropdown menu and select 'Serialized text' as your data source.
3.Set Serialization Options:
Serialization Type: Choose the type of serialization you need. The default shown is 'Decimal (0-9)', which will serialize numbers in decimal format.
Start Value: Set your starting number for serialization. This is where the serialization sequence will begin.
Increment: Determine the increment value – the number by which the serial number will increase with each new label. For instance, if you start at '0' and increment by '1', the sequence will be 0, 1, 2, 3, etc.
Quantity: Specify how many labels in the sequence you wish to print.
4.Add Data: After setting the serialization type, start value, increment, and quantity, click the 'Add data' button to apply these settings to your label.
5.Adjust Text Settings: Optionally, you can adjust the font, size, style, and alignment of your serialized text using the 'Font', 'FontSize', 'FontStyle', and 'Revolve' options in the properties panel.
6.Save and Print: Once you have configured your serialization settings, you can save your label design and proceed to print.


